SnapDog OS
SnapDog OS is a custom, minimal Buildroot-based Linux distribution that turns a Raspberry Pi with an I2S soundcard (DAC) into a dedicated, appliance-like audio receiver. It boots in seconds, connects to your network automatically, and requires zero command-line configuration.
Supported Hardware
Section titled “Supported Hardware”SnapDog OS is compiled as a 64-bit (aarch64) image running a minimal Linux 6.6 LTS kernel. The following boards are fully supported:
- Raspberry Pi 5 / 500
- Raspberry Pi 4 / 400
- Raspberry Pi 3 / 3+
- Raspberry Pi Zero 2 W
1. Installation & First Boot
Section titled “1. Installation & First Boot”SnapDog OS Installer
Section titled “SnapDog OS Installer”SnapDog OS Installer is the recommended guided installation path for macOS, Windows, and Linux. This purpose-built native application presents the supported Raspberry Pi models and release channels in one place, downloads the correct image, writes it to the selected SD card, and verifies the result.
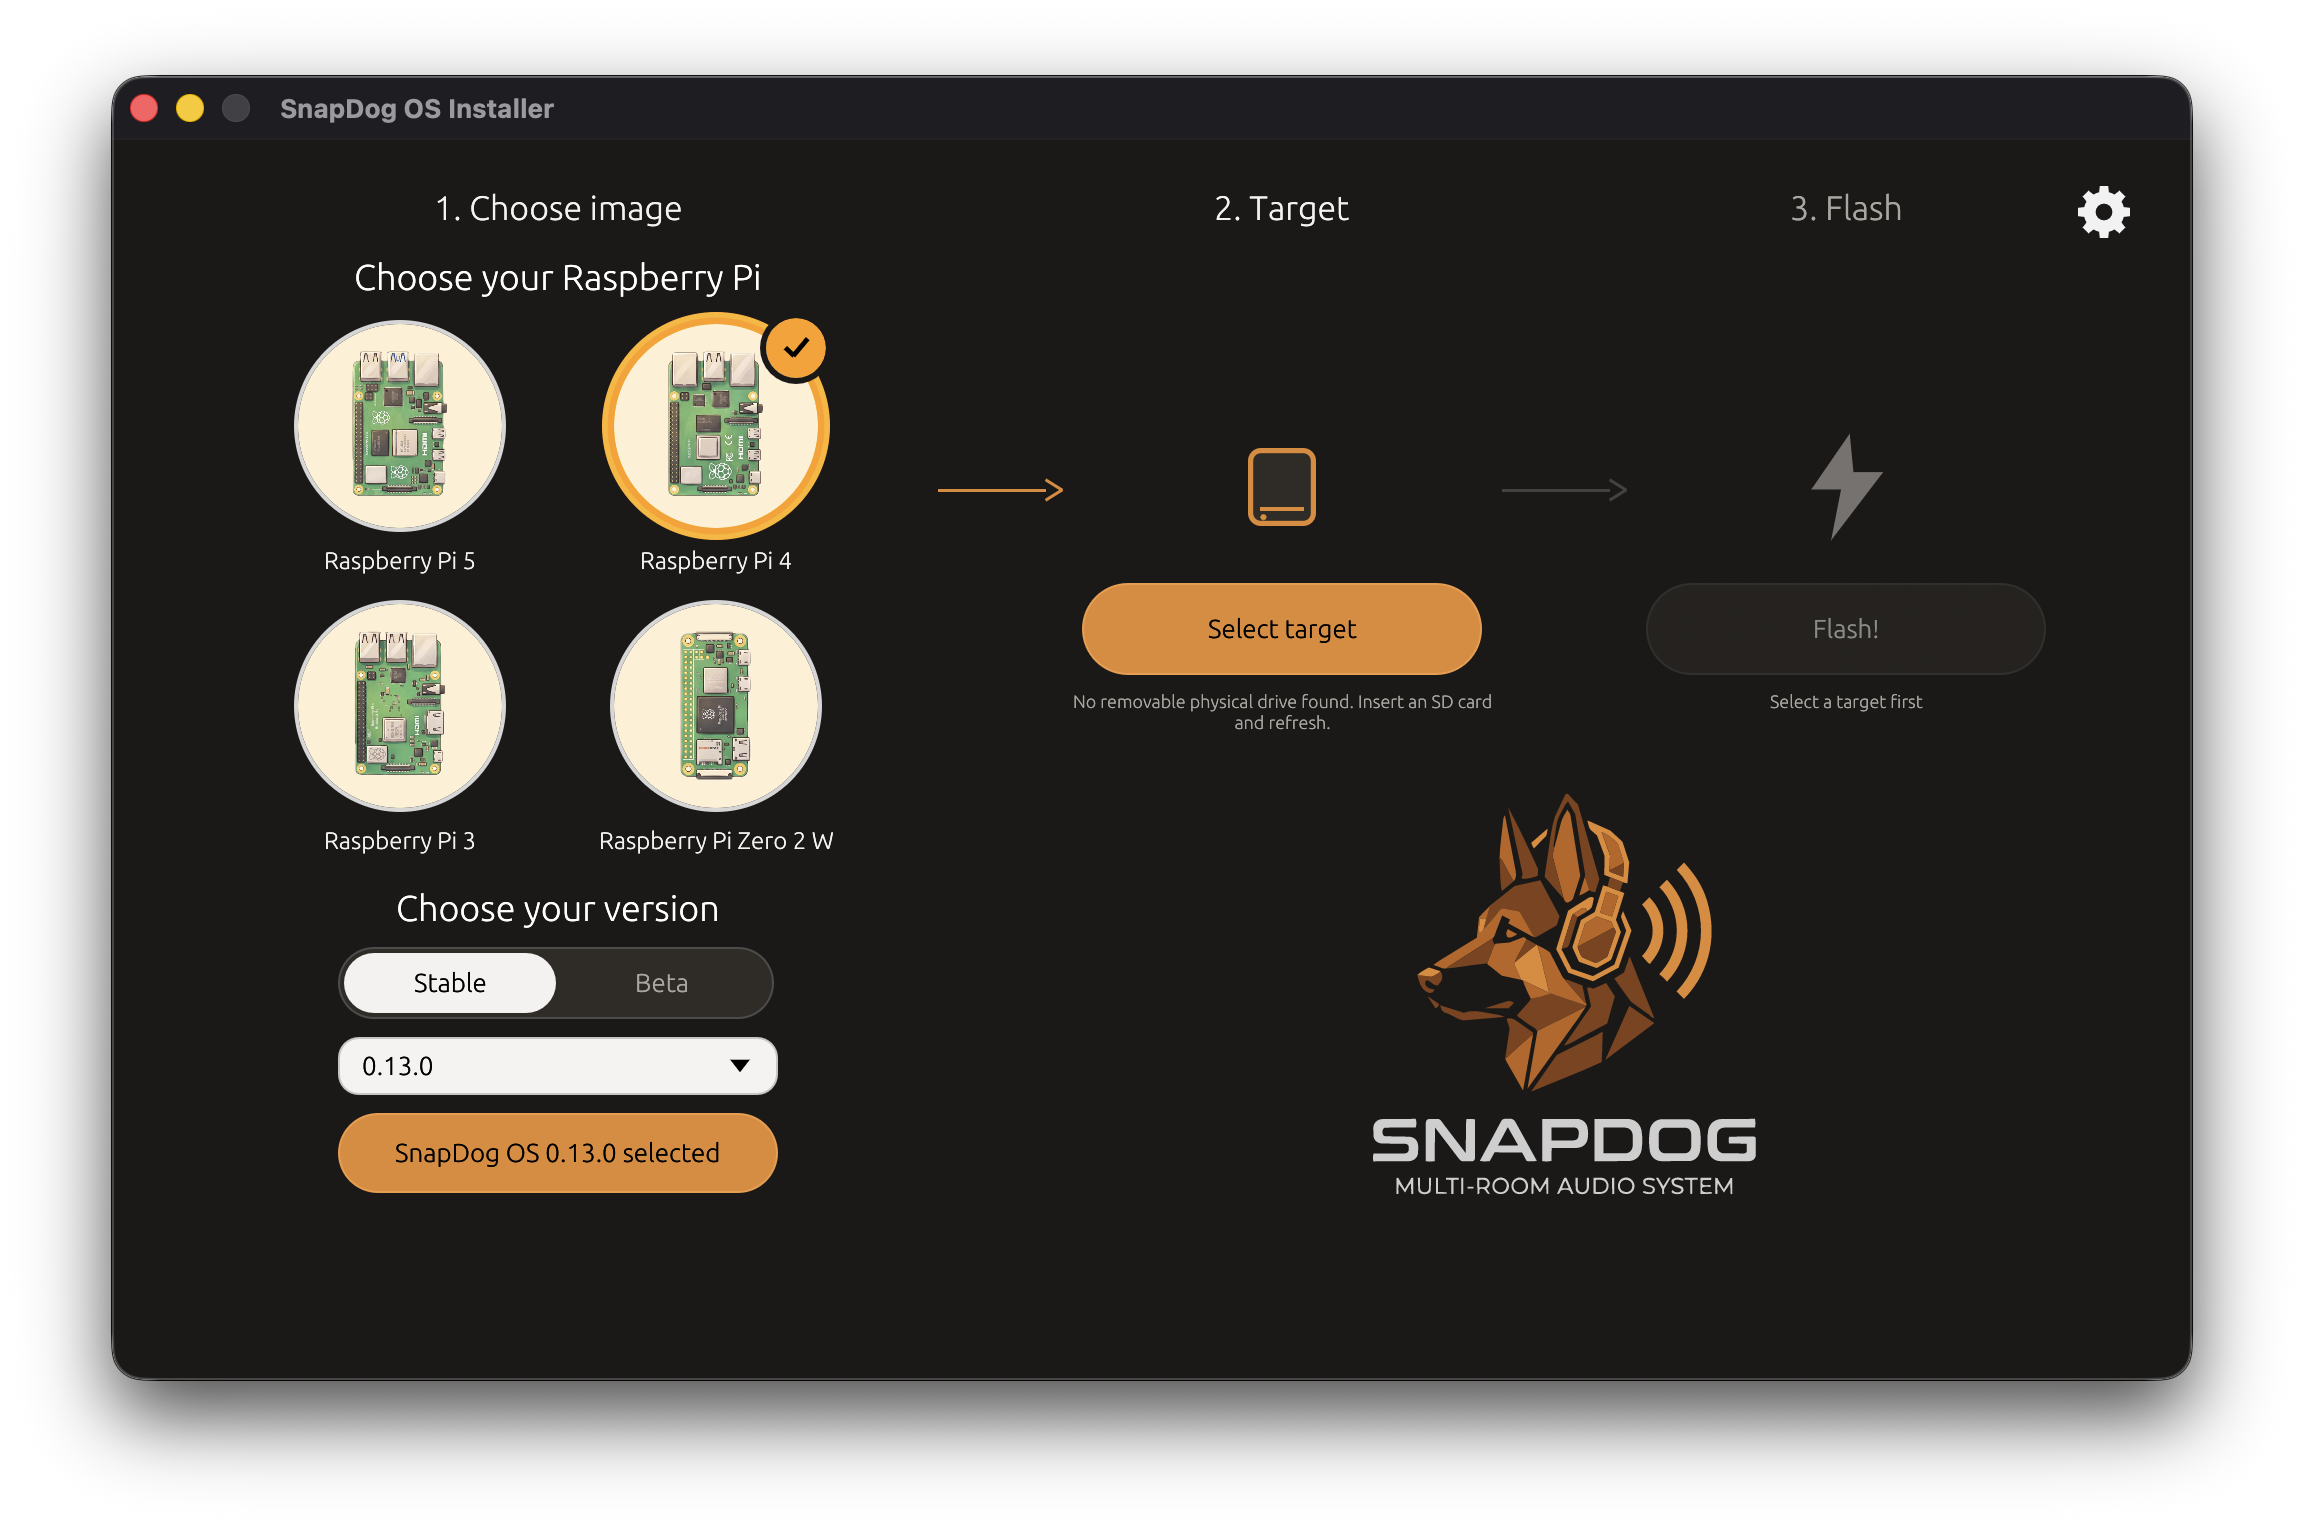
The current release is SnapDog OS Installer v0.2.3.
Download the installer for your computer:
| Platform | Installer |
|---|---|
| macOS (Apple silicon and Intel) | Universal DMG |
| Windows x64 | EXE |
| Windows ARM64 | EXE |
| Linux x64 | AppImage |
| Linux ARM64 | AppImage |
View all release assets, checksums, and build provenance.
Then:
- Install or launch SnapDog OS Installer.
- Choose your exact Raspberry Pi model.
- Select Stable for normal use or Beta to test the newest build, then choose the offered version.
- Click Select target, choose the SD card, and click Flash!.
- Wait for writing and verification to finish before removing the card.
Manual Image Download
Section titled “Manual Image Download”If you prefer another image writer, download the board-specific image:
| Hardware Board Model | Target Architecture | Latest Stable Image |
|---|---|---|
| Raspberry Pi 5 / 500 | 64-bit (aarch64) |
Download Image (.img.gz) |
| Raspberry Pi 4 / 400 | 64-bit (aarch64) |
Download Image (.img.gz) |
| Raspberry Pi 3 / 3+ | 64-bit (aarch64) |
Download Image (.img.gz) |
| Raspberry Pi Zero 2 W | 64-bit (aarch64) |
Download Image (.img.gz) |
Flashing a Manually Downloaded Image
Section titled “Flashing a Manually Downloaded Image”- Download the appropriate image file from the table above.
- Open Raspberry Pi Imager.
- Under OS, choose “Use custom” and select the downloaded
.img.gzfile. - Select your SD card and write.
Setting Up Wi-Fi & Initial Boot
Section titled “Setting Up Wi-Fi & Initial Boot”- Insert the written SD card into your Raspberry Pi and power it on.
- If no working network (wired or wireless) is found on boot, the board automatically spawns a setup Wi-Fi network:
- SSID:
SnapDog-XXXX(whereXXXXis the last 4 characters of the device’s MAC address). - Password: a unique passphrase generated on first use, persisted on the device, and printed to the HDMI/serial console. It can be changed later in the Web UI.
- SSID:
- Connect to the setup Wi-Fi using your phone or laptop.
- Your device will automatically open a Captive Portal configuration wizard.
- Enter your home Wi-Fi details, select your SnapDog server (auto-discovered via mDNS), and select your I2S DAC model. Click Save—the Pi will reboot and join your home network.
2. Web UI Device Management
Section titled “2. Web UI Device Management”Once the Pi is connected to your local network, you can access the configuration dashboard at http://<hostname>.local (or via its IP address) on port 80. The interface is served by a lightweight Rust Axum daemon called snapdog-ctrl:
- Dashboard: Live view of the client hostname, network connections, system load, and uptime.
- Network: Change between Wi-Fi and Ethernet configurations, configure static IPs, or join new wireless networks.
- Audio: Select your I2S DAC overlay (e.g., HiFiBerry, Allo Boss, JustBoom) from the visual list.
- Client Control: Specify the target SnapDog server manually, test playback, configure latency offsets (to synchronize with other rooms), and set default startup volumes.
- Updates: Check for OTA updates, select the release or beta channel, and configure a local-time maintenance window.
3. Architecture & Security
Section titled “3. Architecture & Security”SnapDog OS is designed as a secure, robust audio appliance.
Partition Layout & Read-Only Rootfs
Section titled “Partition Layout & Read-Only Rootfs”To prevent flash memory wear and SD card corruption from sudden power loss, the root filesystem is mounted strictly read-only. All mutable configurations are symbolically linked to a dedicated, writeable /data partition.
| Partition | Size | Type | Mount Point | Purpose |
|---|---|---|---|---|
| 1 | 256 MB | FAT32 | /boot |
Bootloader, kernel, DTBs, config.txt |
| 2 | 1 GB | EXT4 | / (slot A) |
System Root filesystem (Read-Only) |
| 3 | 1 GB | EXT4 | / (slot B) |
Alternative Root filesystem (Read-Only) |
| 4 | 128 MB+ | EXT4 | /data |
Persistent writable settings (Wi-Fi, updates) |
Dual A/B System Updates (RAUC)
Section titled “Dual A/B System Updates (RAUC)”System updates use standard .raucb signed bundles:
- Background Check: Daily automated update checks verify signature certificates and verify partition integrity.
- A/B Rollbacks: Updates install to the inactive slot and boot as a one-time trial (Raspberry Pi tryboot). The new slot is committed only after the system comes up healthy; if it doesn’t, the next boot automatically returns to the last known-good slot.
Security Hardening
Section titled “Security Hardening”- No Default Access: SSH is disabled by default. When enabled, it is restricted to public-key authentication only (keys uploaded via Web UI).
- Authentication: The Web UI/API password is optional. When set,
snapdog-ctrlstores a bcrypt hash and requires bearer-token authentication for protected API routes. Changing it also changes the console root password.